When you add a Meta (formerly Facebook) pixel to your Magento 2 store, it can collect crucial information about the product pages visitors view and the different actions they take in your store, including add to cart, add to wishlist, and of course, purchase.
The information the Meta (formerly Facebook) pixel collects after you install it in your Magento 2 store is essential for optimizing your ad campaigns. You can use it to create custom audiences for retargeting and launch dynamic product ads to target visitors who left products in their carts. In addition, you can create lookalike audiences to broaden your customer base and boost your sales significantly.
This article will take you step-by-step through installing Meta pixel on Magento 2. It will also provide you with information about setting up events for tracking and checking your Pixel’s health.
What is Meta (formerly Facebook) pixel?
The Meta pixel is a tracking code generated from your Facebook ad account and implemented on the header section of your Magento store’s website.
It captures specific actions visitors perform on your site and provides you with data to help you refine your Facebook and Instagram advertising campaigns to maximize performance.
You can use the data your Meta pixel records to show your ads to different audience segments based on their actions on your online store. After creating custom audiences based on your Pixel data, you can also use them to create lookalike audiences to acquire new customers.
The Meta pixel is created and managed using the Facebook Business Manager.
I don't want to go too deep into technicalities, but if you're interested, we have an excellent article explaining in further detail how does Meta pixel work.
Why should I add a Meta pixel to my Magento store?
The Meta pixel has great importance in three areas: Audience creation, measurement, and optimization.
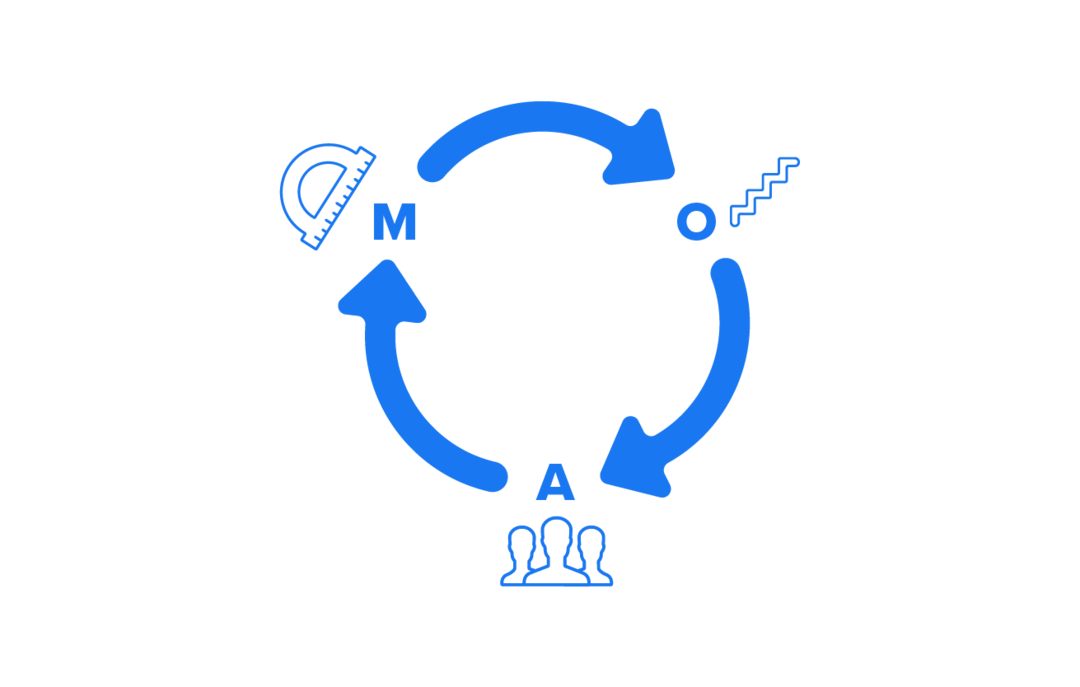
Let's break it down into the 5 main benefits of adding the Pixel to your Magento store.
1. Create custom audiences for better ad targeting
Wouldn’t it be great to be able to show your ads to people who already showed interest in your brand?
Well, with Pixel-based custom audiences you can do exactly that.
Retargeting people who visited your store and encouraging them to purchase more products will definitely improve your conversion rate and increase your sales significantly.
Moreover, unless you sell a single product, audiences have different product interests. And even if you sell a single product, audience behavior in your store may be diverse.
Creating custom audiences based on the Meta pixel data will also allow you to tailor your ads to different audience segments based on the products they’re interested in.
Example: If you are running an apparel store and you want to promote a new line of men's shirts, you can create a custom audience of people who showed interest in men's shirts or general men's apparel in your store. You can use your Pixel data to create a custom audience of people who added various men's apparel to their cart, for example, and display them ads promoting your new men's shirts to increase your sales.
2. Retargeting using dynamic product ads
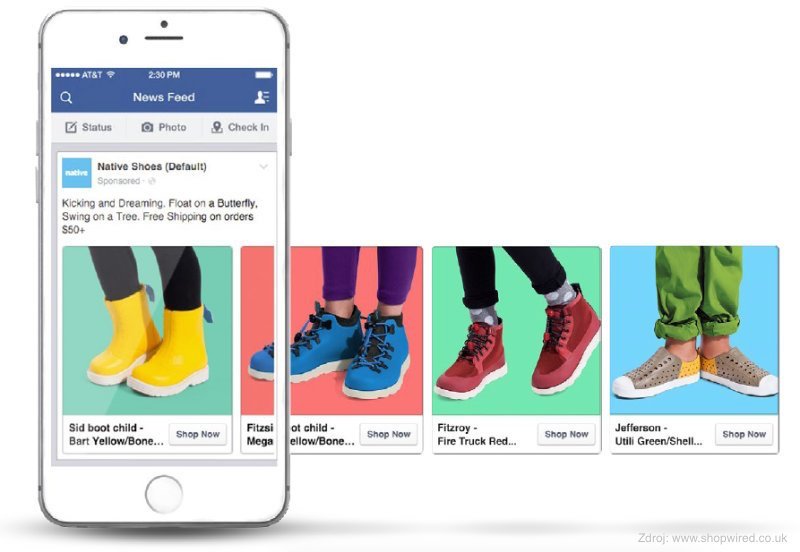
Not every store visit may earn you a purchase. Nevertheless, you can capture the activities of your store visitors and use this data to retarget them with dynamic product ads.
Meta pixel can help you do that. It will capture details of visitors who have clicked products and even added them to their cart but did not complete the purchase.
If you set up your catalog, you can use this data provided by your Meta pixel to run dynamic product ads showing these people exactly the same products they left in their abandoned carts to encourage them to come back and complete the purchase.
3. Lookalike audience creation
Creating lookalike audiences using Meta pixel data is one of the most powerful solutions for acquiring new customers.
Lookalike audiences are groups of Facebook users with similar characteristics to the people in your source audience - in this case, people who visited your store and took action in it.
Facebook has rich data about its user characteristics and it can provide you with great help finding exactly the people who have a higher chance to drive conversions for you.
Example: If you create a custom audience of the people who made purchases in your Magento store, you can create a lookalike audience of people with similar characteristics. These people are likely to make purchases in your store as well and that’s a great way to expand your customer base.
4. Optimize your ad campaigns for conversions
One of your objectives when running ads is to display them to an audience likely to earn conversions for you.
The data you collect using the Meta pixel can help you deliver ads to audiences, which are likely to engage with your products and convert. It will display your ads to people with a higher probability of taking desired actions like making a purchase or signing up for a newsletter.
Example: If you are advertising to increase the number of sales on your Magento store, you can ask Facebook to optimize your campaign for purchase. Based on your Meta pixel data and Facebook’s database, your ads will be shown to people who are prone to make purchases and are interested in brands like yours. Facebook targets these people based on user activity and will display your ads to an audience with high chances of conversion.
5. Understand what actually works
If you don’t analyze your advertising performance and act upon your insights, you’re basically shooting in the dark.
The Meta pixel provides you with essential data regarding your ad performance and you better take advantage of that to improve your future campaigns.
Tracking ad attribution to conversions on your Magento store will let you know exactly which ads work and which don’t. This will help you distribute your advertising budget wisely and improve your results. This data will also help you plan your future campaigns.
You can also analyze your performance among different audience segments according to demographics, placements, and devices. This will help you enhance your audience targeting.
Example: If you run a campaign that includes 5 different ad sets, but only one of them drives purchases on your Magento store, you can pause all the others and scale the top-performer. You can also go down to the ad level and focus only on your successful ads.
This was a brief summary of the great advantages of the Meta pixel. You can, of course, read another article in order to learn how to use Meta pixel in ads.
If you're planning a Black Friday/Cyber Monday campaign (or any other big sale), you should check out our guide.
How to Install a Meta pixel on Magento 2
If you didn’t create a Meta pixel yet, you should read our article about creating a Meta pixel.
Do you have a Meta pixel already? Great!
Let’s install it on your Magento store then.
You can install the Meta pixel on Magento using Apptrian’s extension, Google Tag Manager, or via Facebook’s Events Manager using the Magento integration.

How to install the Meta pixel on Magento 2 using Apptrian’s extension
Installing Meta pixel using Apptrian’s extension is achievable in three systematic steps.
1) Download and Install the Meta pixel to Magento 2 Directory
- Download Apptrian’s Meta Pixel extension from the Magento Marketplace.
- Head to the root directory of your store and go to the app directory.
- Create directory code/Apptrian/FacebookPixel.
- Unzip the downloaded extension and upload it to the root path directory app/code/Apptrian/FacebookPixel.
2) Implement CLI Commands
- To run the CLI commands, first launch an SSH terminal and connect it to your store.
- In order to enable the module, go to your root directory, and run the following command: php bin/magento module:enable Apptrian_FacebookPixel.
- To upgrade the setup, enter this command: php bin/magentosetup:upgrade.
- Next, to install the static content, run the following command: php bin/magentosetup:static-content:deploy.
- Lastly, in order to clean and clear the cache from installation activities, run the following commands: php bin/magento cache:clean and php bin/magentocache:flush.
3) Configuration of the Meta pixel Code in your Magento 2 store
- Place Meta pixel ID on your Magento 2 store by navigating to your Magento 2 admin panel > STORES > Configuration. Click “Meta Pixel” beneath APPTRIAN EXTENSIONS and then click YES from Enabled.
- Click the “Save Config” button on the top of the page to apply the changes.
How to add the Pixel via Google Tag Manager
- In your Magento Admin go to Stores > Configuration > Mageplaza Extensions > Google Tag Manager > Settings.
- Select Yes in the Enable field to activate the extension module.
- Paste your Google Tag Manager’s Container ID in the Google Tag ID in the General configuration.
- Expand the Meta Pixel section in your Magento 2 configuration and enable the feature.
- Choose the ID variable based on product ID or product SKU.
- Insert your Meta pixel ID in the field with the indicative name “Meta Pixel ID”.
- Save the configuration and you’re done.
How to add the Pixel via Facebook's Events Manager using the Magento integration
- Go to the Events Manager.
- Select your Pixel.
- Click “Continue Pixel Setup” and then “Use a Partner”.
- Note: If you already installed your Pixel on another website, you can connect it to your Magento store as well by selecting “Partner Integrations” on the left-side menu when you enter the Events Manager.
- Select “Magento” from the partner integration list.
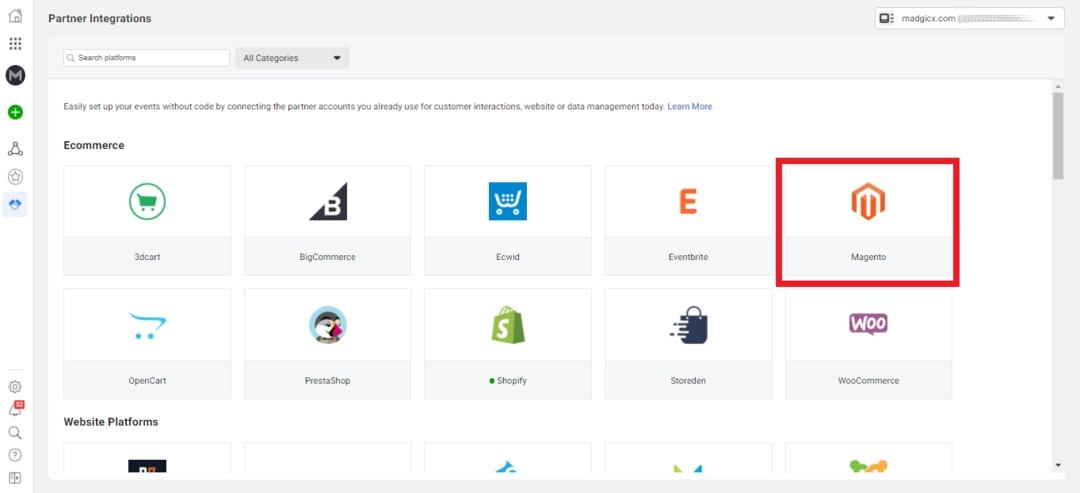
- Follow the on-screen setup instructions.
Meta pixel standard events for Magento 2

Meta pixel standard events for Magento 2 help collect information about user activities on Magento 2 website stores which can be used by store owners and marketers to improve ad targeting.
- Add to Cart: Tracks data of visitors adding products to their shopping carts.
- View Content: Captures visitor activity when they visit store pages like product pages.
- Add to Wishlist: Tracks visitor activity when adding products of interest to their wishlists.
- Add Payment Info: Tracks when visitors enter payment information during the checkout process.
- Complete Registration: Tracks visitor action when they sign up for a service or create an account during checkout.
- Initiate Checkout: Tracks visitor activities when they click the checkout button.
- Lead: Tracks visitor interest in products or services. For example, when they get to a landing page and sign up for a trial or submit an inquiry form.
- Purchase: Tracks when customers complete a purchase and view the “Thank You” page in the checkout flow.
- Search: Tracks visitors when they search for information or products in the store.
Custom conversions
When should you create additional custom Meta pixel conversions beyond the standard events you set up for your Magento store?
Do it when you want to tell Facebook what’s the value of specific conversions for you.
You can also use customization to distinguish between people who viewed different products in your store. Later on, you’ll be able to show them exactly the ads they'll be interested in.
Custom conversions use URL rules based on specific URL or URL keywords, domains, or additional parameters.
Read another one of our articles if you wish to learn how to set up custom conversions on your Magento store.
An example of a useful custom conversion
Let’s say you have a clothing Magento store.
You decided to create a Facebook ads campaign to promote your new leggings. Hence, you want to target an audience of people who will be interested in this kind of product.
In this case, you can create a View Content event and add a URL-based rule that will make the Pixel fire whenever someone views a page at a URL that contains the keyword “leggings”.
Once you achieve a big enough number of conversions, you can create a custom audience of people who completed this event and target them.
Offline events
What if, in addition to your Magento store, you also have a physical store?
How can you track the effect your online advertising has on sales in your “real-world” store?
Have no fear, Facebook offline events are here!
Tracking your offline conversions will allow you to get a full view of your ad performance and also let you create custom and lookalike audiences based on visitors to your physical store.
Efficiently monitoring offline events is essential for implementing a successful omnichannel marketing strategy.
Read another one of our articles if you wish to learn how to set up offline events.
Check your Meta pixel's health after installing it on your Magento 2 store

The most simple way to check that your Meta pixel was successfully installed on your Magento store is by utilizing Google Chrome’s Meta Pixel Helper extension.
This extension is now also available for Microsoft Edge and not only for the Chrome browser.
The Pixel Helper will show you whether your Pixel is active and help you troubleshoot different issues.
Use this link to add the Meta Pixel Helper Chrome extension to your browser and go to your store.
If your Pixel is working, the extension icon will turn blue, and it will show the number of active Pixels on the store’s website. Check also that the Pixel installed on your store has the same ID as the one you see in the Events manager.
Clicking on the extension icon will open a pop-up window, that will tell you whether your Pixel is working properly. If not, an error notification will appear.
You can troubleshoot Pixel-related issues using Facebook’s Diagnostics and Test Events tools. Furthermore, Facebook’s Test Events tool will help you test that your Pixel registers events properly.
Key takeaways
In conclusion, installing a Meta pixel on your Magento store is crucial for succeeding with Facebook ads. Now you also know it’s not such a complicated process.
Having a Meta pixel installed on your store will help you improve your targeting, expand your customer base, and gain more conversions.
The installation process can be simplified by using the Magento integration via Facebook’s Events Manager.
I’ve also provided you with important information regarding the events you can track with your Pixel and about different ways to identify and troubleshoot Pixel-related issues.
So, I think you’re good to go now. Good luck!
*Contributed to this article: Caleb M.
After the iOS 14.5 update, the Meta Pixel alone can no longer give you all the data you need to make effective scaling decisions. Solution? Get accurate performance data with Madgicx Cloud Tracking (MCT).
Yuval is the Head of Content at Madgicx. He is in charge of the Madgicx blog, the company's SEO strategy, and all its textual content.


